
Construction of a Humanure Compost Bin
on a Paved Courtyard with Step by Step Photos
by Emma Holister and David Roure

A humanure compost bin such as this one is where the contents of your compost toilet are transformed into top quality compost. This simple set up totally eliminates the need for costly and polluting plumbing infrastructure, sewerage stations and sceptic tanks. The following photos show how we improvised our compost bin, using Joseph Jenkins' design for a humanure hacienda in The Humanure Handbook as a rough guide.
Because of lack of space and funds we were unable to build the whole hacienda (two bins with a roofed section between them for straw) so we decided to do it bit by bit and build just one bin to start with, and next year we will build a second. A bin like this should take about a year to fill with our small family, and once it is full, we will leave it for a second year for the compost inside it to mature, while filling the second. After two years the compost in the first bin can be emptied and used, which liberates the bin for the next year's new load. In this way a two year rotation can go on indefinitely.
We live in a residential street in a country town and only have a paved courtyard with a tiny strip of earth at the back. Most people wanting to build a humanure hacienda will have fewer problems than we did because as long as you have a small amount of lawn, the bins can simply be built straight onto the earth as explained in Joseph Jenkins' book. However, we couldn't decide which of several options to choose from for the drainage of the leachate (outflow of compost juices) which, if you don't have the bins on a lawn, is your main problem. Because of this indecision the bin was built, dismantled and rebuilt three times! This was because I didn't want to condemn our back soil trench which was our only piece of earth that wasn't raised garden or pots. In the end, condemning the trench was the only sensible option.
We initially built the bin with its drip-off tray over the edge of the soil trench. But on completion, it was clear that the whole set-up was unsatisfactory because the soil trench was cut off from light and sight by the bulk of the bin, so we'd pretty much lost it anyway, and it took up too much space in the sunny central area of the courtyard. So, seeing that my wish to save the trench had been thwarted, we dismantled it, pushed the whole thing back by about a meter and put it directly over the soil, hoping it would drain that way.
However, the workings of the hole we made in the corrugated base of the bin made it too complicated and it was likely to leak, especially in heavy rains, because the trench is very narrow so its drainage is slow. Now the back drip-off tray goes directly into the gutter that leads to the mains drain. Joe suggested that had we wanted a completely closed system we could have had the leachate drain into a bucket with sawdust that could be thrown back into the bin, but in the end laziness won out and the mains drain gets the leachate!
We used larch, which we were told is a strong pinewood that fares well outside and doesn't rot. For the base of the bin we used some cheap sheets of galvanised metal corrugated roofing. For our straw (the compost's cover material) we currently put it on a palette covered with a tarpaulin. As for the water needed to rinse the buckets, we have a water butt that is attached to the house's gutter.
The reason we decided to do this, despite our restricted space, is that we wanted to show to people who live in towns that it's possible to set up an attractive, cheap and efficient humanure composting system even if you don't live out in the wilderness. It is not unheard of for people in cities to go through crises where water and electricity is cut off. Under such circumstances this type of knowledge is essential for townies.
We built the whole structure at a slight incline backwards towards the gutter so that the liquids will drain easily in that direction.
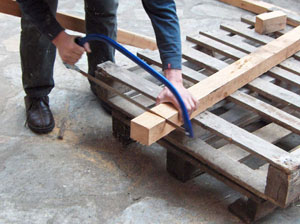 Our bin is 1m50 x 1m50 and 1m25 in height, so David cut the posts and beams to size. Ideally it should be 1m60 squared, but the lengths of plank we'd bought made that too difficult. If you make your bin too small the thermophilic bacteria necessary for converting the pathogens into nutrient-rich compost won't have enough volume to get going with their important job. The compost must ideally reach temperatures of 62 degrees centigrade (143.6 degrees F), or a slower decomposition heat at 43 degrees centigrade (109.4 degrees F). For checking this on a regular basis it's good to have a compost thermometer.
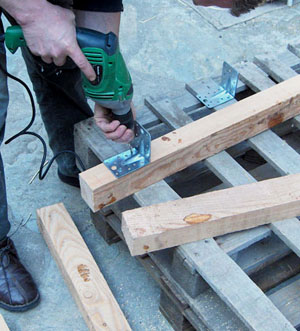 Strong metal brackets were attached to support the cross beams at a height to create legs (the legs were later increased in length owing to the bin's change of location).
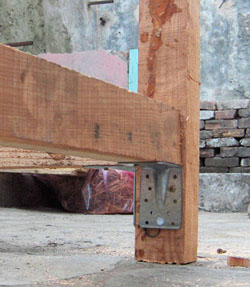
Here you can see a close up of how the brackets are placed at all the joins of the beams. Very few screws were needed because once all the planks are in place, the structure holds itself together snugly.
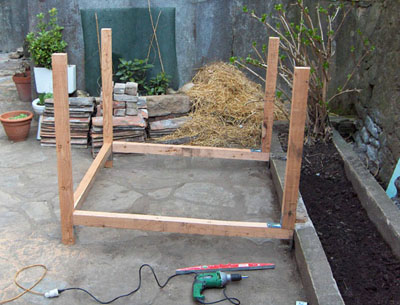 Here is a view of the completed under-structure as it was built initially. You can see the slope of the whole bin. David thought that the back feet weren't necessary and used metal brackets instead. As it turned out, this mistake turned to our advantage when we had to shove the whole structure back a meter where it rested on the back wall of the trench as you'll see in the following photos.
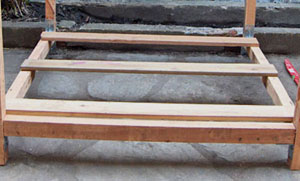
Three planks were nailed to the bottom beams to support the sheets of metal corrugated roofing. When we bought the sheeting it was quite thin so we added a couple more planks after this for extra support before we layed it on.
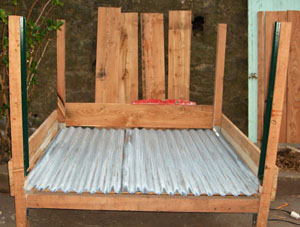
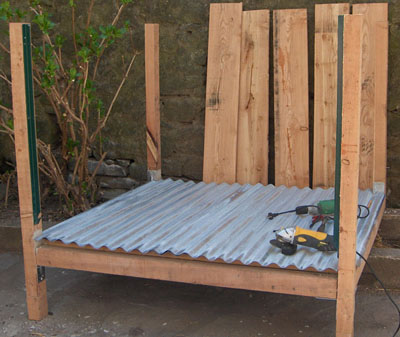 David cut the corrugated sheets to fit the size of the bin, with an overlap at the back so that it jutted over the back gutter. The green metal brackets attached to the front pillars will be explained later, they are part of the system for slotting in the front planks.
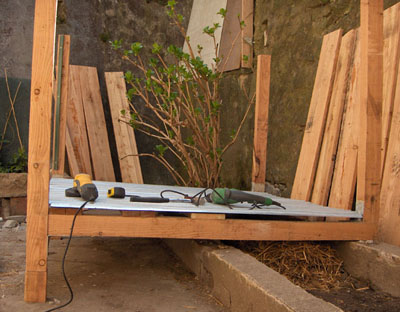 Here is a side view where you can see the compost underneath the bin from our second abortive attempt....
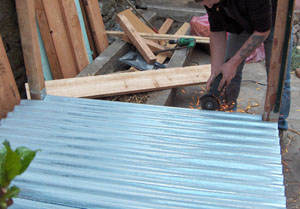
As you can see, the corners were cut to fit the four posts. Here's a close up of one of the corners....as well as our scruffy back gutter...
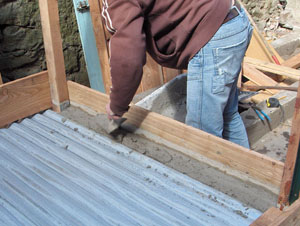
The first planks are nailed around the lower edges.....However, the side edges and corners will leak onto the courtyard if they remain like this because of the gaps.... So the cracks were filled up with cement to prevent the leachate from seeping out where it isn't supposed to. It is important for the concrete to go right up to the far edges to prevent leakage.
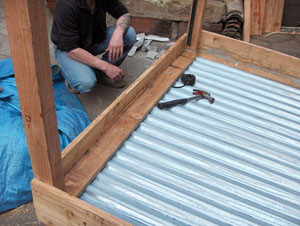 For the front gap, as we wanted all the front planks to be removable, David screwed/stuck a narrow plank perpendicular to the bottom front plank to cover the slit and act as a mini 'roof'. We hope that as this is at the high end of the slope and the contents of the buckets always get thrown to the center of the compost when emptying them, there will be little risk of leaking even with rainfall. This way, when the compost is ready to be removed, all the front planks can be removed including this bottom one which is attached with screws rather than nails. If it doesn't work we'll just cement that bottom gap up like the rest and make do with pulling the compost over this little ledge.
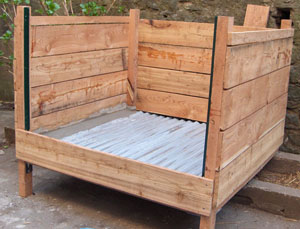 And the rest of the planks go up...In this photo you can see the evacuation holes created by the corrugated roofing where the leachate will drain out of the compost bin and into the gutter.
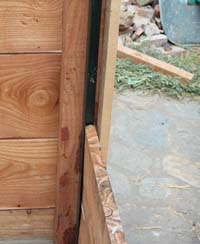
In this photo you can see the system David used for the front planks so that they can be easily removed. They are slotted between a vertical plank at the front and a metal bracket at the back.
.jpg) 1cm deep wedges are placed between the planks as they are attached in order to create airholes. Once the planks are nailed in place the wedges can be removed, apart from for the front planks, because as they are not attached with nails but slotted in, one on top of the other, they need permanent wedges attached to their bottom edges so that the planks can sit on one another with a 1cm gap.
1cm deep wedges are placed between the planks as they are attached in order to create airholes. Once the planks are nailed in place the wedges can be removed, apart from for the front planks, because as they are not attached with nails but slotted in, one on top of the other, they need permanent wedges attached to their bottom edges so that the planks can sit on one another with a 1cm gap.
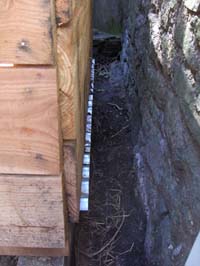 This is how the back of the compost bin looks, with the corrugated base jutting over the gutter so the leachate can run off into the drain. We will eventually attach a more closed gutter system so that it is neater and less exposed.
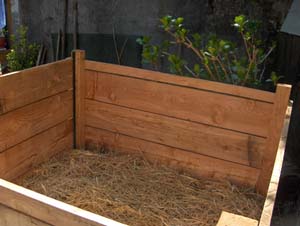 After putting it in, I pulled this straw and compost away from the center and towards the edges, to leave a small depression in the middle of it, in preparation for the contents of my full buckets from the compost toilets. This creation of a hole in the middle of the compost's mass can be done with a pitch fork. After each time you throw in the contents of your buckets (which is the only time you ever get a waft of smelliness in the whole compost toilet process) fresh straw is then layed on top of it as a cover material to stop any odours getting out, to prevent flies, as well as being the perfect material to create small air pocket layers inside in the compost so that it breathes, ferments and heats up efficiently. To this mix it is good to add kitchen scraps, dead leaves and vegetation to create the optimum environment for all the little compost creatures to do their work. As this compost is not exposed to soil, we will buy compost worms from the local gardening shop as well as maybe an organic compost activator if we suspect it's not heating up and compacting down fast enough.
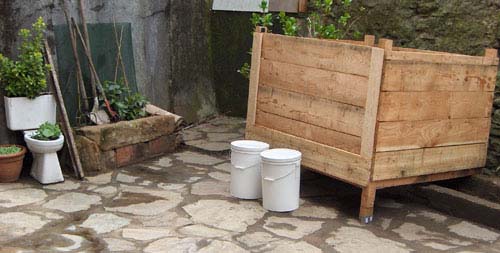 Voila! The completed humanure bin. We will put metal covers on the four exposed tops of the corner posts to prevent them from rotting before the rainy season begins. People here do this the simple way by placing empty tin cans over them. However, David will cut out some small non-rust metal squares and fit them on top of the posts neatly. We will also get some chicken wire mesh to cover it with just in case any rogue animals ever want to get in there. So, I am finally able to get my buckets out!...
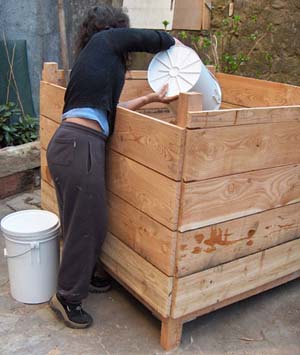
And chuck their contents into the very center of the compost where I'd created a dip with a pitch fork for it to fall into without spilling towards the edges. This is the only time ever that you will get a smell from your buckets, as the contents, kept odourless by the cover material while in your loo, become exposed and slosh out into the bin. (The photo below was taken before we dismantled the whole thing and redid it with slotted-in front planks...). As you can see I'm in my very scruffy work clothes. However, if you want to empty your compost buckets in your high heels and fancy town get up, feel free....
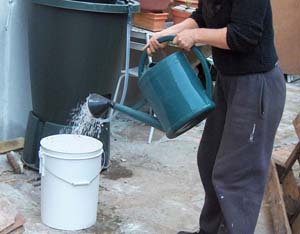
I give the bucket a rinse with water from my butt using a watering can which is useful for efficiently rinsing the bucket.
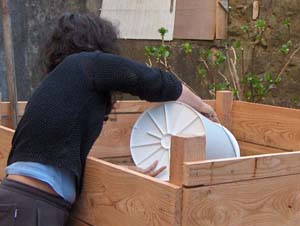
I take the bucket back to the bin and chuck the liquid with the remaining dregs into the compost.
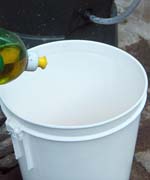 Then I return to the butt and give the bucket a good wash with ecological washing up liquid...
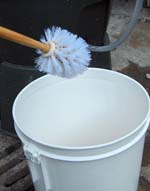 ....and a scrub with a toilet brush...
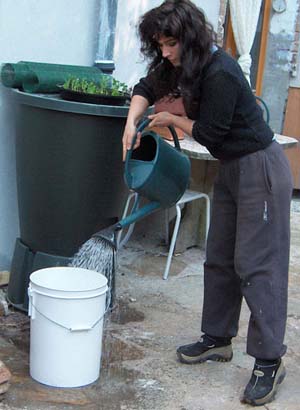 And I give it a final rinse to get the soap off. For two buckest you don't need to use more than a total of, say, eleven or twenty litres depending on how efficient your cleaning method is. .
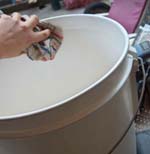 A final wipe down... If the plastic bucket begins to be a bit smelly after a period of time, either leave it outside for a day in the fresh air or, as it's only the base that can start to smell slightly, put sawdust into it right after cleaning and this immediately stops any odour.
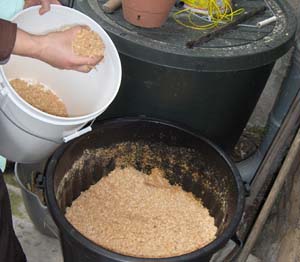 I put some fresh sawdust into the bottom so that it's ready to go back to the bathroom....
...where I put it back in my avant-guarde toilet and admire the view....as well as bask in the joys of being free from the water grid.....
A few facts to remember about compost toilets:
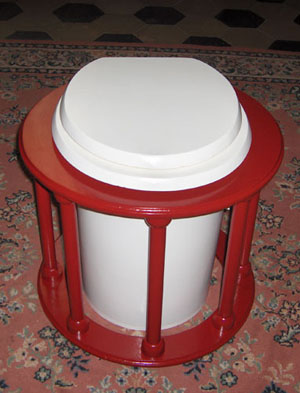 1) They do not smell!! The organic cover material such as sawdust or dead leaves blocks all odours completely to the point where you can have your ravishing, state of the art toilet in the comfort of your bedroom and be done with long treks to the bathroom during the night.
2) By no longer using flush toilets you save about forty litres per person per day and become significantly more independant from the costly, wasteful and polluting water grid. Say goodbye forever to costly plumbing, toxic sewerage and septic tanks.
3) You show your friends and family that people in rich countries are capable of taking responsibility for the environment by sharing knowledge that will resolve the most serious problems in poor countries ravaged by epidemics caused by lack of adequate sanitation. This type of toilet is the solution to the world wide problem of water pollution and water scarcity.
4) By applying the simple composting methods taught in 'The Humanure Handbook' by Joe Jenkins (www.jenkinspublishing.com) you can produce your own top quality compost to use either on your own vegetable garden or to sell to local compost dealers. Emma Holister www.art-margin.com, www.candida-international.org .

For Email contact go to About Us
Established in 2001, GreenHomeBuilding.com is primarily a labor of love. Kelly, and the GreenHomeBuilding team of experts, have answered thousands of questions for readers over the years, and we continue to publish up-to-date information about increasingly important sustainable architecture. If you feel moved to assist us in this work, your kind donation would be much appreciated; this can be easily done through our PayPal account:

VISIT OUR OTHER WEBSITES:
[Natural Building Blog] [Earthbag Building] [Dream Green Homes]
Disclaimer Of Liability And Warranty
I specifically disclaim any warranty, either expressed or implied, concerning the information on these pages. Neither I nor any of the advisor/consultants associated with this site will have liability for loss, damage, or injury, resulting from the use of any information found on this, or any other page at this site. Kelly Hart, Hartworks LLC.
