
Steps in Ramming Earth
 Clifton Schooley is a green building professional specializing in insulated rammed earth construction and architectural design in Canada and worldwide. His vision is to create environments that are beautiful, artistic, sustainable and have a positive social impact. Clifton believes that both design and construction of a building must be intimately connected to bring maximum benefit to both people and the environment. Beyond rammed earth his ambition is to become an eco-developer and influence society on a larger scale. For more information, visit: www.rammedearth.info
Questions and Answers
Q: To avoid high-rise formworks and coordinated/synchronized wall building, I propose making large rammed blocks, say 4' long, 2' high and 1' foot wide. These could be hand rammed in a standardized set of forms laid on the floor. I then intend lifting [I have the mechanical means to do so] the large 'bricks' and lay a wall using suitable mortar. How does this idea sound? Is it technically doable or are there flaws in the concept?
A: Yes, you can make large rammed earth blocks and place them similar to using concrete blocks. The blocks would need to be reinforced with steel to withstand handling, keep in mind each block would weight around 1000 lbs. There are a few things to consider before taking this approach vs forming walls as 1 piece. Do you live in a seismic zone? Like stone, brick or concrete block walls the weakest points in the walls are the mortar joints which are the first to fail in an earthquake. By keeping the entire wall as 1 piece the seismic resistance is increased substantially. Secondly, if you love the layering look as most people who are attracted to rammed earth do then you will loose that magic with block and mortar approach. Thirdly, do you have any rammed earth experience. The blocks will need to be well made with the right mix.
Before becoming a rammed earth builder I had looked at all kinds of modular/block construction and in the end decided making a large wall in place couldn't be beat. The forms using a repetitive standing panel system like we use are reasonably priced and the lumber can be used after on the current building project or another. If your project is super low budget and buying the forming material is not an option then I would say proceed with your idea. Ultimately you need to do what inspires you and done with skill both approaches will work.
May I ask what is the typical reinforcement you recommend?
Don't be intimidated by the movable forms or scaffold. A lot of rammed earth can be made in a reasonable time frame with this method, for example this afternoon in 5 hours we made 120 cubic ft of wall. I would speculate that it will take more energy to make the blocks which still need a forming system, although they may be smaller it will need to be done many times and moved as well. Also the steel inside needs to be factored in, it will be a tricky thing to do. With rammed earth the steel is placed inside as you build it vs concrete which the steel is already in place before being poured. The steel configurations will need to be different for each material. I think it would be good to talk to an engineer for the steel configurations in the blocks because you need to factor in the method for lifting and where the force will be applied to the blocks. My instinct is that you will be in for a lot more work than you expect by going the block route. However, if you do, maybe you can find some rebar detailing on standard concrete block construction and apply it to your project.
Thanks again for a thoughtful reply. You have truly persuaded me away from modular blocks. I was influenced by your logic and by your beautiful work. Now that nudges me to the next stage. Where can I find good plans/instruction for making reusable formwork. There are photos yes, but no descriptions or plan. Also, I have ordered David Easton's book. is that a good one to start with? Are there any others for a diy person which gives good construction drawings and step by step details?
There are no plans/instructions for the type of formwork we use. You will need to learn from someone who uses it. We teach workshops and there is also someone in the states who teaches but uses a different form system using through ties. Perhaps there is someone else out there who uses this method but I don't know who, you will need to look around. The most important thing is to learn the basic technique of doing the rammed earth properly with the right material selection and mixing, ramming, forming and curing procedures. You will want to find a professional rammed earth builder who is experienced with structural rammed earth walls that can pass targeted compressive strengths. Once you have that knowledge you can experiment with different types of forming systems. Different people use various forming systems for different reasons, ours gives the best overall finish that I know of and is efficient and cost effective also. With that said, other forming systems will work well also but may give different finishes or looks and have increased cost to buy.
David Easton's book is a very good place to start.
Q: Can I replace my hydraulic chisel/demolition tool with a hand tamper like tool made and fitted in their stead? Have you any experience in this direction?
A: I haven't heard of this type of conversion before. I am certain the chisel will not work because in has a small stroke and the tampers have a larger stroke with higher velocity. My suggestion is to use hand tampers made of steel that weight 12-14 lbs. We have done the walls for entire houses by hand. You just need some people willing to work hard and give them shade while they work.
Q: I am researching earth sheltered housing and rammed earth construction and would like more information on the soils used. I know soils vary widely, but is there a general trend as to a preference with certain soil types or orders? Soil testing, too, seems to vary. Are there any standardized soil tests that are always performed when determining whether a particular site soil will work for E.S.H. or rammed earth? What kinds of tests for strength, compaction, compression etc do they do?
A: (Leonard Jones) Generally speaking a sandy clay is ideal, but there are limitations. And.you can do something with practically any soil if you are willing to work within its practical limits. David Easton gives some good guidance in his book, The Rammed Earth House, which I strongly recommend you obtain and read if you are interested in rammed earth - much more than I could possibly outline here.
Q: I am currently a final year architecture student in university college dublin, Ireland. I am looking for structural information and how I could construct a small panel myself which would be most true to the actual construction.
A: (Leonard Jones) There are at least a couple of ways you could build a small panel of rammed earth. I'd suggest that you make it at least 12 inches thick so that you get something of the feeling of massiveness that comes with the real thing. There are five steps that you need to take - I'll describe them briefly.
1) Foundation... If your rammed earth panel is to be more than temporary, you need to place it on a firm foundation of concrete. If it's temporary, you could place it on a sidewalk, a driveway, or even well-compacted soil.
2) Forms... Rammed earth uses forms that are similar to those used for placing concrete. You could just build a set of concrete forms for the size of panel you want to build, and it would do fine. Or you could build a set from 2 inch x 12 inch lumber planks, a technique that is much-used in third world countries. The lumber should be surfaced rather than rough-cut so you will get a smooth finish. Start with two planks that are as long as your wall section will be high. Place them vertically, as far apart as the wall will be long, plumb them, and hold them in place with knee braces. Then place two more planks on the ground alongside the two vertical pieces, twelve inch side vertically and use some construction screws or some long clamps to hold them to the vertical pieces. You can add more planks until the form section is as high as you want it - or you can wait until the first 12 inch high section is filled and compacted before you add more planks (this will make it easier to move earth into the forms). When your forms are ready, you should paint the sides with a thin coat of vegetable oil or a commercial form release agent so that you can remove the forms later without damaging the surface
3) Obtain and mix earth... You will need loose soil in the amount of 140-150% of the inside volume of your forms. It should be a sandy soil without larger gravel - say 3/4 inch or larger. It should also have some amount of clay content so it is cohesive (holds together well when dampened and compacted. If you want the wall to be around for very long, you will need to mix the soil with about 3-4% by volume of portland cement for stabilization. Other stabilizing agents are available, but portland cement is most commonly used as it is widely available. Once you have dry-mixed the earth with the portland cement (or not) you will need to add approximately 10% water by weight. You don't want the soil wet or muddy, just nice and damp so it's easy to compact. You can tell by taking a handful of the damp earth and forming a ball in your hand. The amount of water you have to add depends on the type of soil,
4) Load earth into forms and compact. Load about eight inches of earth into your forms. Level it with a garden rake or other implement until it is roughly level. Then compact the soil into the forms using a manual or pneumatic tamper. Avoid hitting the sides of the forms and take care to make sure you get good compaction in the corners and around the sides of the forms. You will be able to tell that the soil is fully compacted when the tamper bounces back from the earth instead of sinking in and you start to get a kind of "ringing" sound as you work. The original eight inches of soil will compact down to about a 5 inch final height. Then repeat this process until your panel is complete. This is a LOT of work. If your rammed earth panel is very large, you may want to get a couple of stout fellows from the local rugby club to help. (They will usually work hard for beer afterwards!)
5) Removing forms... Allow the rammed earth panel to rest in the forms overnight. Then remove the forms starting at the top and working to the bottom. Stand back and admire the result.
Rammed earth is pretty simple when you get down to the basics. If you want more information, I'd suggest you obtain the book, "The Rammed Earth House," by David Easton and Cynthia Wright. Easton and Wright are California architects who specialize in earthen construction. The book covers all aspects of rammed earth. Easton, also an engineer, provides some interesting insights into form building and construction methods.
Q: Do we need to treat the rammed earth with the addition of 6% or so concrete?
A: (Leonard Jones) 6% would be higher than normal for the SW US. But, the need for stabilization varies widely from one soil to the next, so I can't answer this one definitively. A good, adobe-like soil that is sandy with 20-30% clay might do very well with no stabilization at all. If you have a sandy gravel with some clay, maybe 3% by weight of portland cement would do the job. Lime can also be used under some circumstances. If your soil has a significant amount of silt rather than clay, be cautious... It's hard to add enough stabilizer to get non-cohesive silt to stick together. Eventually it will break up. A good guide would be to find out what the local builders are doing and follow their general guidance (assuming their buildings are holding up well). Don't be afraid to make some test blocks to see how they compact and hold up...
Q: I was wondering if there is a formula mix for making rammed earth walls with concrete? I live in outback Australia and want to build a house out of rammed earth. I am in the process of making simple forms. I have not had any experience in this, just read a few books but I have not come across a water to concrete to earth mix.
A: (Leonard Jones) If you have a good adobe clay soil - a mixture of clay, sand, and small gravel in the right proportions, it is even possible to do rammed earth walls with NO added cement. This works especially well in arid climates and in situations where you can protect the walls with wide eaves. If you can, it is not only economical, but also environmentally beneficial. (Cement manufacturing uses as lot of energy and emits a lot of carbon dioxide.) But, many of us don't have that sort of soil on our sites or nearby, so cement is necessary.
In your situation, the first thing I would do is what's called the "Jar Test." What you want is a well-graded soil, with about one third of the soil volume in small gravel/coarse sand, one third fine sand, and one third fines. If the soil varies greatly from this goal, you may want to consider other potential sources, or mixing soil from two or more sources. The "Jar Test" will help you determine this. First, clear off any topsoil or organic stuff in a small area for your test. Then take a quart (sorry, liter for you, bloke!) jar and fill it about halfway up with the soil you are planning to use. Throw out any large gravel or rocks. Then fill the jar to the top with water. Shake it up really well, until the soil and water are completely mixed. Then set it down on the table and let it sit until all the earth has settled and the water above the soil is completely clear. The soil particles will settle out, biggest ones first - smallest ones last. Then take a look at the result. You should typically see three fairly distinct bands of soil. The bottom band will be small gravel and coarse sand. The second level will be fine sand, and the last level will be fine material, either silt or clay. What you want is a well-graded soil, with about one third of the soil volume in each of these categories. If the soil varies greatly from this goal, you may want to consider other potential sources, or mixing soil from two or more sources.
Now you have to look into the character of the fines in your soil; you need to know if they are clay or silt. Clay is cohesive and will help your rammed earth mix hang together after it has been rammed into place. Silt is non-cohesive and is likely to cause your rammed earth mix to fall apart after it has been rammed into place. So - what you need to do is called the "Thread Test." Pour off the excess water in your jar slowly and carefully. Then take a spoonful of the fine material and let it dry until you can roll it into a nice damp but solid ball between your palms. Try to roll the ball out between your palms to form a thread. If you can get the thread down to about 1/8" in diameter, you almost certainly have cohesive clay. If it breaks apart much before that, you probably have silt. If you determine that you have silt, look elsewhere for your soil.
A good adobe soil typically has 30-40% clay with the remaining soil divided between coarse and fine sand. Once you have determined that your soil has the right constituents and that the fines are not silt, you can make some test blocks. I like to use 2" mailing tubes as forms for the test blocks. They can easily be cut into 4" lengths and you can ram damp soil mix into them with a wooden hammer handle or something like that. Oil the inside of the forms with a little vegetable oil to help them release from the rammed earth.
Mix up some samples in a kitchen pan. Start by weighing your soil or soil mix, then add Portland Cement in the proper ratio. Most rammed earth mixes I've seen utilize 3-4% (by weight) of Portland. Concrete makers would call this a "one-bag" mix. The cement should be enough to stabilize and somewhat strengthen your finished rammed earth, but no more. I'd start with 1% and make samples up to 5% to start with. Make enough rammed earth to make 3-4 or more samples of each cement percent. Mix the rammed earth with about 10% water by weight and ram it thoroughly into the mailing tube forms. Label these with the contents and put the aside to dry. This may take a week or more, depending on humidity, etc.
When the samples are completely dry, you will want to test their compressive strength. I have seen a variety of home-made testing machines that can be used for doing this. If you can't figure out your own, let me know and I'll send you a couple of sketches. Most of these involve stacking pre-weighed bags or buckets of sand or other material on top of the sample. The standard for rammed earth and adobe in the SouthWest US is 300 pounds per square inch. I don't know what kind of mailing tubes are available in Oz, but here in the US, the 2" nominal tubes have an inside diameter of about 1.8." In this particular case, this means that the sample must withstand the force of 763 pounds of "stuff" before breaking. If your rammed earth can meet this test, it will certainly withstand any and all normal building loads.
I hope this helps you figure out how to design a rammed earth mix. It's a little involved, but every soil is different and there are no standard recipes. Also, if you are interested in rammed earth forming, I'd suggest you obtain and read David Easton's book "The Rammed Earth House." Easton is an engineer and architect from California who has put a good deal of thought into the subject.
Q: I am high school student working on an earthquake science fair project. I want to build model buildings out of rammed earth. What is this rammed earth made of?
A: (Leonard Jones) Rammed earth is a mixture of soil, usually a sand/clay type of soil, with some binder, like Portland cement or asphalt cutback that is mixed together with about 10% by weight of water. The mixture is then placed in forms, like concrete wall forms and compacted or rammed to maximum density... This forms a dense, strong wall that will hold together under most conditions. I would suggest that you read David Easton's book, "The Rammed Earth House," as you do research for your science project. Easton is a California architect and engineer who is familiar with the seismic aspects of the material.
Q: Would it be possible to use strawbales as the formwork for rammed earth? It seems like stacking strawbales and pinning them together with rebar would be easier that setting up forms made from lumber or plywood. But would the bales be strong enough to withstand the pounding needed to make the earth walls?
A: (Leonard Jones) Simple answer.... No
Q: Would cliche make a suitable soil for making a wall?
A: (Leonard Jones) I presume you mean caliche, a clay found in Texas, New Mexico and some other places...?? I'm not sure how well it would do. The only way to know is to try it and see... I'd get some of the material and mix up some samples similar to what you have in mind for a wall. Then ram the sample material into a form - and go through the same process you'd go through with the real thing just to see. If the samples cure out to a strong material that will resist water to some extent, then probably so... Also, if you are in Texas or New Mexico and they are making adobes from the local caliche - and the adobes are holding up OK, then it would almost certainly work... There really is no general answer, materials vary considerably even within local areas...
Q: I have red clay on my site that is described as a sandy clay loam. I rammed a block for a test and added by volume 10% portland cement. The block doesn't seem to be stable. I did not wet the mix...could this be the problem? Or is a Sandy Clay Loam a silty soil?
A: (Leonard Jones) Let me start by pasting in something from Wikipedia: Loam is soil composed of sand , silt , and clay in relatively even concentration (about 40-40-20% concentration respectively). Loams are gritty, plastic when moist, and retain water easily, yet they keep a lot of the water. They generally contain more nutrients than sandy soils. In addition to the term loam , different names are given to soils with slightly different proportions of sand, silt, and clay: sandy loam, silty loam, clay loam, sandy clay loam, silty clay loam.
This is a pretty good non-technical definition, IMHO... Now some explanation - but excuse my rambling...
Sounds like your soil will contain at least some silt. Silt is a very fine soil - it has nearly the same order of particle size as clay, but it lacks the cohesiveness of clay. You can run a jar test to tell just how much. As long as it's less than 10-15% you should be OK, but if it's a larger percentage constituent, you may have problems.
What you are doing when you make rammed earth is trying to make a "soil cement" where the clay and the cement provide sufficient "glue" to make the wall hold together. Clay is cohesive and adds a lot of "glue" power... If the amount of clay is not sufficient for the overall mixture, like a good adobe sandy clay soil, you'll have to add some cement as additional "glue." The problem with silt is that it is very fine - with an extreme amount of surface area to be "glued." But it entirely lacks self-cohesion.
Conventional concrete consists of cement, sand, and gravel in a proportion of approximately 1 - 2 - 3.. This will be a mixture that contains 4-5 bags of cement per cubic yard. This can vary significantly if the cement is engineered to meet specific technical specifications and mixed precisely in a batch plant. But it's in the ballpark. So your test batch of rammed earth contained a little more than half the cement that normal concrete would contain. This should be more than adequate. However... concrete mixtures harden and gain strength and stability from chemical bonding of water between the particles of cement. The "paste" of cement and water forms a matrix of "glue" in which other particles reside.
My guess is that your sample is not stable because you added no water - and the amount of water in the soil was not sufficient to cure or harden the cement. Try again... Make sure the ingredients are well-mixed... Add just enough water so that a little water is forced out of the mixture - ponding on top a little bit as you ram it. Let it dry for a few days - until it is completely dry to the touch and hard - before you take it out of the form.
If you still don't get a good stable block, there's a good chance that there's a lot of silt in the soil and its non-cohesive character is interfering with the mix.
If you do get a good block with 10% cement, try some more sample blocks with less cement. Ideally, you should be able to get a good rammed earth mixture with about a 1 - 2 bag mix - 1 or 2 bags of cement plus enough soil to make up the rest of a cubic yard. or maybe a little more... When you decide on a mixture for your house, it should have as much cement as it takes to get a good, hard, stable block - plus a little extra to make up for any variations in soil or mixing.
Q: I did a Jar test but I'm not sure what I am looking at. I measured the layers. My top water layer never got clear. Maybe it will not since it is red clay. Here are my measurements can you tell me what I'm looking at?
Bottom Layer is 1"
Middle layer is .50"
And the Top Layer is 1.25"
A:(Leonard Jones) I'd have to look at your jar test results myself to be sure, but it seems likely that what you have is this:
Top Layer - 1.25" - if the particles are too small to see with the naked eye, it's probably clay - if they're just barely big enough to see, it may be silt.
Middle Layer - 0.5" - this is probably fine sand and/or silt.
Bottom Layer - 1" - this is probably coarse to medium sand.
It is not uncommon for very fine clay particles to remain suspended in water indefinitely. Anything is sufficient to keep them stirred up... If you put the jar in a dark closet and keep it there undisturbed for a few weeks, you might see some signs of settling. If the top layer is indeed clay, then your soil would be classified as a sandy clay, which should be good for rammed earth... The next step is to make some samples by ramming the earth into a form - to see how much water you have to add for compaction/curing and how much cement you need to add as a stabilizer.
Q: I'm an architecture student at Kingston University in London, UK. I am doing a project in the seaside town of Margate, Kent in which chalk is a very commonly seen material. I was interested in seeing if chalk could be used as a rammed earth material and was told about a material called clunch which my lecturer believed is a rammed earth chalk product. I cannot find anything on the internet about clunch being used in this way, and then stumbled across your site that has plenty of rammed earth information. Basically have you ever heard of clunch or a rammed earth system using chalk. If not can you think of how it would be achieved? I have a clunch quarry near me that are willing to give me chalk dust but they do not know about the rammed earth uses either. I want to simply cast a small block as a material study and am desperate to find out what to do. I would appreciate any help or general pointers you can offer.
A: (Leonard Jones) I have no familiarity with chalk materials. However, chalk - Magnesium Carbonate, usually - has some chemical and physical similarities to other materials - such as gypsum - that are used in earth building. My suggestion would be to do some tests to see how well it works. Architect David Easton's book, The Rammed Earth House provides some guidance on testing soils for rammed earth. I'd adapt his methods to the chalk you will be using and make some samples to see how it works out. In the past, I have run similar tests by preparing a soil mix and then ramming it into or 2 or 3 inch cardboard mailing tube. Then I allow the material to cure and then test it.
Perhaps you could then find someone in the Civil or Materials Engineering departments who could run some compression tests. You'd be looking for a product that could withstand approximately 300 PSI of compression. You might also take a look at The Earthbuilder's Encyclopedia by JoeTibbets, a New Mexico earthbuilder. This volume has comprehensive coverage on all aspects of earthbuilding.
Q: I am interested in building a rammed earth structure, and am curious as to whether or not an electric jackhammer or a large electric demolition hammer, retrofitted with a bell shaped tamp, can achieve the same results as a pneumatic backfill tamp in terms of soil compaction.
A: (Paul Shippee) I do not know the answer to your question. However, I think it depends on the force developed in those two alternative jumpers. It sounds to me like they are too powerful. You do not want the impact to break apart the soil as it is being compacted. You do want it to compact nicely. Even tamping by hand can, if done too much, can overdo and break the soil, rather than make it cohere. Try some tests and see what works is my best advice on that. Listen for that sound, like a hollow thud, that echoes thru the forms -it tells you when the compaction force is just right!
Q: I was wondering if you make a round rammed earth structure my using corrugated grain bin sheets for forms. Grain bin Diameter sizes increase my increments of 3" so if you wanted a wall that was 1'6" in width you would build two rings; say a 24ft diameter inside a 27ft dia.. Upright channels (stiffeners) could be bolted to the side wall - bolted to the cement foundation at the base on both inner and outer wall and held together at the top by nutted threaded rod. Doorways and windows could be made my by forming earth bag walls in the two diameters to form a void for windows and doors.
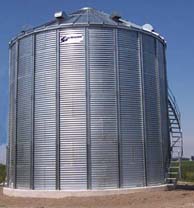 The corrugation on a grain bins runs horizontal (as shown in the photos). I had spoken with a rammed earth home builder a number of years ago and he told me that a corrugated rammed earth wall might have an appealing ascetic as well as adding to the strength of the wall -a thin gauge sheet metal could be place against the wall to make a straight rammed earth wall. My thoughts on using grain bin rings as forms are that a round form work would be considerably stronger than a straight wall form. Retaining rings could be bolted to the vertical upright channels (stiffeners) to give the forms even more strength - these were used on the tall "hopper tank" in the second picture - 3 rings at the top of the bin. Form work like this could be put up by a crew of 4 people in about 3 hours.
A: I think your idea might be possible.But the horizontal corrugations will make it difficult to get compaction up against the sides of the forms using conventional rammed earth techniques. What I'd suggest is that you try what's called "poured earth" where a mixture with more water is poured into the forms and allowed to dry with only enough compaction to make sure that any large air bubbles in the mix are worked out. I'm not so sure about using earthbags as door and window bucks, as they lack stiffness. I think you should obtain some of the corrugated material and do some tests to see how it goes.
C: My company "Blasting Solutions Ltd" here in the UK has developed a pneumatic rammer for use in the aluminium smelting industry which is light at 11kg (22 lbs) and relatively vibration free. The butts are lightweight and due to this acceleration is higher and compaction is as good if not better than rammers which are heavier. The added benefit is to the health of the operator long term through lower hand arm vibration exposure! I would be happy to furnish more details and also look to supply the rammers to any organisation which may be able to hire for example to potential builders. Perhaps a rammed earth hire shop with especially adapted tools. Contact me on the email address for more info. Graham Dewhurst: bsl_enquiryATbtinternet.com
Q: I am wondering if a concrete vibrator will work to compact rammed earth? I have located an inexpensive cordless tool and wonder if it would work.
A: This tool is definitely not the tool for the job. It is always great to look for new or better ways to do something. But sometimes it is not worth the effort. Take for example a nail that you want to drive into wood, a hammer is definitely the best tool for the job. You could also use a rock or some other heavy object but they are not as efficient ... try using a feather and it will not work. The vibrator can be likened to using a feather to drive a nail. Vibrators only work in liquid. By the way, your question is fine and I'm not making fun of it, I just want to answer it colourfully. The most effective way to compress rammed earth is by using a hand tamper or a pneumatic tamper. Both effectively pound the earth mixture into the form using a lot of force in a small area. Big tampers with large surface areas are not effective. I would suggest you take a course by either myself or someone else to get the fundamentals of rammed earth down. It is actually a sophisticated building medium that requires a lot of skill to do effectively. The people who propose on the internet that it is easy either have not done or can not do quality work. By the way, many times their raw material mixture is not even the right material to be using. So anyways back to your question, I would recommend that you go with tried and true methods and save the innovation for a later time after you have had some success with the proven technique.
Q: Is it possible/advisable for the rammed earth technique to add sawdust to the earth mixture?
A: It is not advisable to add sawdust or any organic matter. Properly constructed rammed earth is made predominantly with gravel and sand as ingredients, the clay and silt are small portions of the mix. Essentially you have a durable stone like material. Adding organic matter will not allow the material to compact and bond properly. In addition sawdust expands as water is added.
Q: We're considering using off-the-shelf formwork (plastic/aluminum) that is designed for concrete constructions for our rammed earth construction, and wanted to understand if formwork designed for concrete can withstand the forces involved in ramming. Literature on this seems to be sparse.. To determine suitability from formwork manufacturers' specifications, are there any accepted figures for the forces and pressures involved in (a) hand ramming (b) pneumatic ramming?
A: There are no standards that I'm aware of. Chances are good that any form work designed for concrete will work for RE due that it is designed for high pressure of the force of cumulative pressure of the liquid above it. Ideally you should test some of the form work by building a small wall to see if it suits your needs. Hand ramming is easier on the forms although over ramming with high force can put extra stress on the forms.
Q: Can I use a Greenlee hydraulic tamper? I am on a very limited budget and building a rammed earth house in the Chihuahua desert. I have a motor and can get a pump for only a couple hundred dollars. It seems to me that it's just too expensive to buy a large air compressor. The construction process will be over a year by my self, and renting a compressor is also too expensive.
A: I recommend using the tried and true tampers for the industry running off of air. Lighter weight with and they have a round head. I have never heard of anyone using a hydraulic tamper and you would be committing to a new type of tool; it may work but what if there are undesirable effects like excessive vibration or who knows?
It is true that for projects that are done slowly, big compressors are costly. Sometimes used ones can be bought for cheap. But in your case I suggest buying a smaller air compressor that will run just one tamper at a time. One that does around 20-25 CFM(Cubic Feet per Minute) of airflow. Check the tools specs to confirm that this is sufficient. For a tamper, I like to use http://www.henrytools.com/air-rammers.html The 1380 2BF or secondly the 1350 2BF. But an equivalent tamper is fine if you find a good one. This tool can be run off of this type of compressor: http://centrair.ca/gas_powered_compressors.html . The compressor can be gas or electric depending on what is best for your situation, there are a bunch of manufacturers . A unit like this may be around $3,000 , a lot cheaper that the typical trailer mounted compressor that can cost $15,000+ and deliver more air than you need. If your budget is too tight for this compressor, I suggest reducing your house size by 10 square feet and you will have it covered. After you finish using it you should be able to sell it for 1/2 price of more, It is a very good value if done that way.
I highly recommend taking a course to learn to build walls before you start building; it's actually a lot more involved than a few Youtube videos and some random reading on the subject might make you believe.
Q: If I use marine grade plywood, what could be the optimum thickness of plywood (shutter) for Rammed Earth formwork? And, being new to pneumatic tampers, is there any specific disadvantage over manual rammer?
A: 3/4" marine ply is optimum and a common thickness. Pneumatic tampers don't get tired like people and will give you consistent compaction. The disadvantage is that you need to buy the pneumatic rammer, rent hose and a compressor and use fuel to run it. However if you are in a place where labour costs are high then pneumatic is usually best. If labour costs are cheap and the quality control is good, then manual is usually best in this case.
Q: When the walls are stabilized, what should be used? Lime or concrete? Preliminary results of a basic soil composition test indicate a soil that is more or less Loam. And is it advisable to us a lime plaster on the exterior walls similar to straw bale - if so, does the exterior require a rough texture prior to plastering?
A: You can use lime, which is more technical than just using portland cement. I suggest portland cement for simplicity and cost. If you want to go through the extra time and expense of using lime, testing etc,, you could do that. Loam is good, but you should add, a mixture of various size stones from 3/4" and less. This will allow the material to compact well and give the finished wall high structural strength. Think of concrete aggregate and how it is graded, you want a similar mix but in this case you will have clay and silt also in the mix. Plastering a beautiful wall is a tragedy, and extra time and an unnecessary expense. Instead, do a good job on your form-work, build the wall properly and let people enjoy the beauty of the walls for a thousand years!
Q:How much rebar do i need to use in the walls, and how do you tamp around the rebar if any?
A: The amount of rebar depends on several factors: mix design, seismic zone, inner and outer wall thickness, load on top of the walls and height of walls. This needs to be looked at on a case by case basis according to your building design; best to have your building designer and engineer collaborate.
Q: Can rammed earth be used in a tilt-wall scenario? That way, the 1-foot (or however thick) slabs could be made on the ground with a few rebars embedded, then lifted into place. I prefer using lime instead of cement to make the whole project even greener. Please let me know if this has been tried to your knowledge.
A: I'm not aware of this being tried before; it could bring risks as the material cures slower than concrete for one and secondly you may have separation at a lift layer when not cured fully. Rammed earth is ideally a cast in place material. Lime can be used of course, it is more technical than using portland cement.


